sales@dreamkitchensuk.com | Phone: (01843) 584702 or Fax: (01843) 586664


Hello

Welcome to our kitchen tips page.

Even household routines and chores can be a breeze, with our helpful cleaning tips.
I hope these can be of some use to you and we would be interested to hear from you with your own ideas.

All of these tips have been tried and tested and any information is as accurate as possible.
However, we would like to point out that these tips should be used at your own risk and we are not liable for any claims, or damage, arising from using the remedies.

Before trying out any of the remedies, experiment on an area hidden away, not on direct view, first.


Please click here, to download our latest kitchen brochure.


Please click here, to download our latest Appliance brochure.


Adobe Reader
If you do not have a copy of this essential PDF viewer, please download FREE software from the icon below.

 
Get Adobe Reader  
Download the latest version of Adobe Reader.

*See our price promise.*


Kitchen Tips

This page has been requested by customers, asking how to clean different materials. This is Dream Kitchens
guide to useful tips, some of which have been supplied by manufacturers and others by customers.

Although these tips have been tried and tested, we would like to point out that they should be carried out with
caution and used at your own risk, we are not liable for any claims, or damage, arising from using the remedies.

Please check with your kitchen supplier, or manufacturer first, as guarantees can be invalidated if the correct advice isn′t taken as recommended.
It is always safest to take any manufacturers advice foremost.

Before trying out any of the remedies, experiment on an area hidden away, not on direct view, first.


Enter the BBC Virtual home tour for more house tips...


If you feel that you have a good tried and tested tip to offer others and would like to contribute to this page,
please send your tip to us via our  contact page, and we will endeavor to include it at a later date.


 Cleaning Timber Doors:

Wooden doors should be wiped over using a soft slightly damp cloth and then thoroughly dried. All kitchen cabinet doors are lacquered to protect the timber and any colour staining used in its manufacture, this lacquer breathes to protect the timber from humidity, so any polishes used, could possibly “clog” the breathing ability of the finish, the supplied door is adequate for normal use.

Return to the top of the page

 Cleaning Foil and Vinyl Doors:

Cleaning is easy with warm water, a sponge and liquid cleaners. Ensure doors are dried with a clean dry cloth to
eliminate signs of water marks. For more stubborn marks use a non-abrasive cleaner, avoid excessive heavy
rubbing in one small area, as it can not only remove the colour but change the sheen level.

 Cleaning Corian®:

* For the full Dupont™ Corian® Use and Care Guidelines, please view here. *

Upon installation a Corian® worktop will have an overall satin sheen finish. However as you use it, Corian® acquires a smoother more silken finish and appearance. Even the cleaning properties appear to improve with use.
To prevent this lustre developing unevenly, use a gentle abrasive powder bleach e.g. Bar Keepers Friend® (on left) or a mild cream abrasive cleanser e.g. Cif, once or twice a month over the first few months.

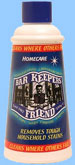
For normal cleaning of worktops just wipe with a (clean - grit free) damp cloth using an ammonia-based hard surface cleaner, e.g. Flash, or Mr. Muscle, or use a solution of warm water with a mild detergent and dry with a soft clean cloth or paper towel, using a circular motion.
Although liquids cannot penetrate Corian®, any spillage of fluids should be wiped up immediately to eliminate staining.

Clean the sink, with a damp cloth and detergent as above, wiping it well and rinsing to get rid of any oils and fat or, spray with a hard surface cleaner and leave a few minutes before rinsing/wiping clean with a damp cloth and finishing with a dry cloth.
If any stains need more attention sprinkle a gentle abrasive powder bleach on the damp surface and leave for a few minutes before using a soft cloth to rub with a circular motion and rinsing/wiping then drying.

Once or twice a week, give your sink a beauty treatment. Remove all the fat & oil residues of normal food preparation from the sink, using detergent or hard surface cleaner. Partially fill the sink with warm (not boiling) water. Add 1-2 teaspoons (5-10ml) of liquid household bleach, and leave for a few hours or overnight. You do not need a strong solution. In the morning, the sink should be beautifully clean, with very little effort.

As Corian® is non-porous, most stains can be removed with a damp cloth. More stubborn stains, even cigarette burns can be removed with abrasive plastic scouring pad e.g. Scotch-Brite, using common household abrasive cleaners. Always using a circular motion over a wide area, do not try rubbing excessively on a small spot, as it will leave an indent to the worktop.

Rather than cause accidental damage, prevent such damage in the first place:

  • Always use a heat protection pad or trivet (with rubber feet) for hot cookware, or leave cookware to cool on the hob first.
  • Never put hot pans, particularly cast iron, directly on a Corian® top or in a sink. Such heat can damage any surface!
  • If you must put a hot pan on the base of a sink use a protective sink mat, sponge, or cloth beneath. It is best to leave the utensil to cool slightly first, or put a few inches of cool water in the sink before the pan.
  • Avoid pouring boiling liquids directly into sinks without turning on the cold tap as well.
  • Use occasional overall cleaning as described. Darker colours may show wear and tear more readily and need a bit more attention, just as with dark coloured wood. However if Corian® is accidentally scored or scratched more severely (e.g. by kettle or toaster, or unglazed ceramic pulled across the surface) you can usually restore it yourself.
  • It is not a good idea to cut or chop on Corian® - it will score the work surface! Use a chopping board instead.

The beauty of Corian® is that even after many years of use your worktops will still look good. Most damage can be repaired and the original hygienic surface restored. It provides a long-term, renewable, easy-to-work-on, sympathetic surface.

Return to the top of the page


 Cleaning Granite:

Granite is a hard and reasonably non porous stone that is unaffected by most chemicals, but it still requires a high proportion of care when cleaning.
Strong chemicals should be avoided.

How to look after your granite worksurface:
Here is some basic recommendations on how to keep your granite surface clean.
Keeping to these simple tips on your new granite worktop, can keep the surface looking new for many trouble free years ahead.

  • Always clean (by dabbing the cloth) any water marks or liquid spillages instantly.
  • Regularly dust the surface, with a lint free clean dry cloth.
  • Do not rub with abrasive materials, instead, wash with clean warm water to which a non-abrasive light neutral detergent (PH7) may be added.
  • Use a few drops of neutral cleaner, stone soap, or a mild liquid plate washing detergent such as fairy liquid or just warm water.
  • After using the soap solution, rinse well, as too much cleaner or soap may leave a film and cause streaks, dry with a chamois leather
    or similar.
  • Always use a clean rag, if you do manage to stain the top, knowing the chemical or fluid that instigated it, is 90% of the battle
    in removing it.
  • All products containing acids should be avoided, any acid in high concentration etches the surface.
  • Remember, do not mix bleach and ammonia; this combination creates a toxic and lethal gas.
  • Do not use any abrasive powders or creams that may create scratches, if in doubt - don′t use it.
  • Do not rest extremely hot pans over granite worktops, since the granite quickly absorbs heat and distributes it out causing marks.
  • Drainer Grooves can be cleaned using an extremely fine wire wool.

Although one of the least absorbent stones, Granite can be stained by grease, wine, coffee, nicotine, fruit juices, even gin and champagne!
Any spillage must be removed immediately from a granite worktop, delay could cause permanent damage.

Remember:
Hot pans, should only be placed directly on a granite worktop for short periods (a trivet is safer).
Blot up spills immediately, before they penetrate the surface.
Use coasters under all glasses, particularly those containing alcohol or citrus juices. Many common foods and drinks contain acids that could etch or dull
the stone surface.

How to test the fluid absorbency of your granite:
The density and porosity of granite varies as to the colour chosen, some colours are tougher than others.
Take a piece of the scrap granite you want to test and spill a few drops of lemon juice onto it. If you see that under the drops of lemon it very quickly develops dark spots, it means that it′s a very absorbent stone. If it takes a minute or so to be absorbed, then you′re dealing with a degree of absorbency that′s easily manegeable with the application of a good-quality sealer (all our granite worktops are treated with "Lithofin" sealer from the factory). If it doesn′t absorb at all, then you have the least absorbant (toughest) of all granite worktops.


Removal of Marks and Stains:
If you are reading this because you are thinking of purchasing a granite worktop, please don′t be put off by the following tips on stain removal. If your worktop is looked after as advised above, there is no cause for alarm. It is rare for granite to be damaged and after the many hundreds of installations we have carried out the amount of problem stains reported can be counted on one hand. However if you were to mark it, removing stains can be difficult but not immpossible. Most granite owners show off their worktops with pride, looking as the day it was bought for many years after. This next section is for anyone unlucky enough
to have a rare accident involving a spillage, the damage is normally due to fluids having been left for a long period unattended.

All stones are, more or less, absorbent. We know that diamonds, or any other gemstones are not absorbent, but a gemstone is not actually a stone: it′s in fact made of one crystal of one single mineral. All other stones are the composition of many crystals, either of the same mineral, or of different minerals bonded together. The "space" in between these molecules of minerals, determines the porosity of a stone. The stones porosity varies greatly, and so does, their absorbency. Some stones are extremely dense; therefore their porosity is low and can can be considered almost irrelevant. Some other stones present a medium porosity, and some others are extremely porous. Because of their inherent porosity, many a stone will absorb liquids, and if such liquids are staining agents, a true stain will occur.

A natural "stain" is something else that has nothing to do with the absorbency of the stone: It has instead to do with its natural chemical makeup. It is still a discoloration, but it′s actually a natural cosmetic damage to the stone, caused, when it was formed millions of years ago.

Sometimes it can be confusing to tell the difference between a natural "stain" and a man-made stain. All those stains that look like water spots, or water rings, are actually marks of corrosion created by some chemically active liquid which has been left on the worksurface but not cleaned up, mostly limited to acids, which have had a chance, to come in contact with a stone that is sensitive to chemicals. All Calcite-based stones such as marble, limestone, etc. are sensitive to acids; therefore they will stain easily. Slate, too, will stain, and so will a few granites that, aren′t 100% silicate rock, but are mixed with a small percentage of calcite.

Before you can choose any chemicals for stain removal, you need to identify as to what caused it, before trying to remove the discoloration.

There are five major classifications of stains:
Organic stains - includes wine, coffee, tea, nicotine, fruit juices, coloring agents of Cola and other drinks, gravy, mustard, etc.
Inorganic stains - includes ink, color dies, dirt - water spilling over from the plant pot, etc.
Oily stains - includes any type of vegetable oil, certain mineral oils - motor oil, butter, margarine, lard,etc.
Biological stains - includes mildew, mould, etc.
Metal stains - includes rust, copper, etc.

Please read this - before carrying out any of the following remedies.

It is always advisable to contact your stone supplier before undertaking any DIY work.
Guarantees can be invalidated if the correct advice isn′t taken as recommended.

Although these tips have been tried and tested, due to the many different factors that make the stain and the different absorbency rates of
different stones, they may not work for everyone. Sometimes a blemish can be removed fairly easily, other times it has to be repeated
several times. Any information given is as accurate as possible, but is to be taken only as one possible option for stain removal.
However, we would like to point out that these tips should be carried out with caution and used at your own risk, we
are not liable for any claims, or damage, arising from using the remedies, it is your choice whether to use them.

If you still decide to go ahead, please use extra caution when handling all chemicals listed here, remember to
wear safety goggles and rubber gloves. Please thoroughly read Material Safety Data Sheets for each chemical before use.

For extremely stubborn stains, where conventional cleaners and all else has failed, you can try the following:
  • Organic and Inorganic stains - the chemical of choice (for both) is Hydrogen Peroxide (30/40 volumes - which is available at your local beauty shop or hairdressers. Sometimes, in the case of ink, Denatured Alcohol (rubbing alcohol) may turn out to be more effective.
  • Oily stains - use Acetone, although under Health & Safety this can be difficult to find, this can sometimes be found at the hardware or DIY paint store. Don′t use any nail polish remover: some of them contain other chemicals and can make things worse.
  • Biological stains - you can try using regular household bleach.
  • Metal stains, Iron (rust) - Poultice with Oxalic Acid + Powder + Water.
  • Ink - Poultice with Mineral Spirits or Methylene Chloride + Powder.
  • Oil - Poultice with Ammonia+ Powder Methylene Chloride can also be used on tough oil stains.
  • Coffee, Tea & Food - Poultice with 20 percent Hydrogen Peroxide + Powder.
  • Copper - Poultice with Ammonium Chloride + Powder
  • Paint (water-based) - poultice with a commercial paint remover + Powder
  • Paint (oil) - Poultice with Mineral Spirits + Powder. Deep stains may require Methylene Chloride.

Poultice materials:
Paper towels, Cotton balls, Gauze pads, fuller′s earth, Talc Chalk or Saw dust.

To apply a poultice, take the following steps:
1.  Clean the stained area with water and stone soap. Remember to dab the cloth rather than wipe.
2.  Pre-wet the stained area with a little water. Distilled water is recommended.
3.  Refer to the list above and determine which chemical to use for the stain removal.
4.  Mix the poultice material with the selected chemical. Mix until a thick peanut-butter paste consistency is obtained.
5.  Apply the paste to the stained area, overlapping the stain by at least ¼ of its size. Do not make the application too thick, or it will take a long time to dry.
6.  Cover the paste with a plastic sandwich bag or food wrap. Tape the plastic to the surface using a low-contact masking tape.
7.  Allow the paste to sit for 12–24 hours.
8.  Remove the plastic cover and check to see if the paste has dried. If it has not, allow it to sit uncovered until thoroughly dry.
9.  Once it is dry, remove the paste by scraping and rinse the area thoroughly.
10. Examine the stain. If it still remains, but is somewhat lighter, re-poultice until it is gone. If the stain refuses to disappear completely, ask your local stonemason for help.

So after explaining how stains are formed, being able to identify them, and removing them, please return back to the beginning of this granite heading for basic recommendations on how to keep your granite surface clean.
Keeping to these simple tips on your new granite worktop, can keep the surface looking new for many trouble free years ahead.

Return to the top of the page


 Cleaning Quartz:

Cleaning a quartz worktop is easy because it can simply be done with warm water and a sponge or cloth and dried with a paper towel or a cloth. If you accidentally spill household chemicals on your quartz worksurface you should blot it up right away before rinsing it with plenty of water. If you have extra stuborn stains, use a damp cloth and a small amount of non bleach, non abrasive liquid cleanser or a vinegar water solution. For very stubborn spills, use a household vinegar cleaner with a non-abrasive cleansing pad. Rinse thoroughly and dry with a paper towel or a cloth. Repeat if necessary.

Quartz is one of the world’s hardest materials, which is your assurance that the worktops will not easily scratch. However the use of a cutting board and trivets are recommended to maintain the from new polished condition of the worktop, so as to continue looking as new as the day it was purchased. Like all fine materials, quartz responds best when handled with care and attention.

Quartz may have the same characteristics as granite when it comes to being heat, chemical, and scratch resistant, but quartz is harder and non-porous compared to granite. Quartz worktops have become more popular because they are more durable and can resist stains caused by coffee, wine, vinegar, and lemon juice. It is still advisable to practice preventative measures such as using pads or trivets for hot pans and using a chopping board when you need to prepare food.

Even though quartz resists permanent staining when exposed to common household liquids such as wine, vinegar, tea, coffee and lemon juice or fruits and vegetables,it is highly recommended that you wipe up food and spills quickly. It is always easier to wipe up a spill than to have to deal with a dried-in stain.

 Cleaning Laminate:

All that is required to maintain your laminated worktop is to clean it with a soft cloth and warm soapy water. Using washing up liquid is ideal. Never use harsh abrasive cleaners or abrasive scouring pads as these will damage the surface. To remove any stubborn food stains use any non-abrasive cleaner such as Cif or a mild (diluted) bleach.

If you have some stubborn marks and all household cleaners have failed, you can remove stains by rubbing with distilled vinegar, alcohol or neat bleach. Rust and food stains left on a laminate worktop after a baking sheet has been sitting overnight, have been removed using a dab of non-gel toothpaste worked in with a fingertip. Also Bicarbonate of soda gently rubbed on to a stain with a damp cloth, will remove it. For more stubborn stains try making a paste out of the powder by adding it to a small amount of water and leave it for several hours on top of the stain, before rinsing and wiping with a clean cloth.

If you own a Gloss worktop, more care needs to be given to everyday tasks which you wouldn't consider if it was a standard textured laminate. Use cutting boards for any food preparation or cutting, and trivets for hot pans. Clean with soft detergents such as washing up liquid, on no account use abrasive cleaners, pads or cloths direct to the surface. After using the soap solution, rinse well, as too much cleaner or soap may leave a film and cause streaks, dry with a lint free cloth.

Please note: The high pressure laminate used on worktops, is made by layers of paper impregnated with resins. The paper sheets are
then fused together under a very high temperature and pressure, this fuses the layers into a single decorative sheet known as a laminate.
The decorative laminate on your worktop, is only around 0.7 mm thick, not the 40mm it looks, containing aprox 18% plastic resin; the rest is paper!

Before trying out any of the remedies, experiment on an area hidden away, not on direct view, first. As laminate is a very thin layer,
some chemicals and constant rubbing could alter the worktops overall sheen level; causing more damage then you started with!

As the laminate on your worktop is a thin plastic material most scatches cannot be removed, so damage is permanent.
In very light minor scatches, polish the counter with lemon oil or car wax, but this could also alter the worktops overall sheen level.

 Treating and Cleaning Timber Worktops:

Use Soap flakes (not soap liquid) for the day-to-day cleaning of the timber worktop. To remove stubborn stains use a scouring pad (not steel wool) dipped in bleach. If this is not sufficient, sand the surface length-wise with fine sandpaper then apply a coat of Danish Oil and leave to dry for 30 minutes. NEVER use cleaning products that include Sal ammoniac or scouring powder.

If the worktop is fitted over a Belfast sink you should continue to use Danish oil monthly, or whenever beading of water no longer occurs on the worktop surface.

Household appliances that produce heat such as coffee makers, toasters, etc, should never be placed directly on the worktop, but on a heat resistant mat. This protects the worktop from coming into direct contact with heat sources that can result in the wood becoming discoloured, drying out, or in extreme cases splitting.

If dishwashers, washing machines or dryers are installed under the worktop, a barrier shield MUST be fixed to the underneath of the top to prevent excessive heat or moisture ingress. It is recommended that an alloy edge be fitted on adjacent edges when a top is installed next to a cooker or range heat source.

The first eight weeks of the solid worktop′s ′life′ will lay the foundation for the perfect condition expected for it′s future. Each top should be sanded to approx 120 grit eliminating the need for heavy sanding although further light sanding is recommended, follow by oiling with Danish oil. It is vital to oil ALL surfaces to ensure that the board reacts to moisture equally. This includes the underside although unseen, and all cut surfaces to prevent the ingress of moisture. Do not sand finer than 180 Grit as this could lead to difficulty in getting the oils to penetrate.

Prime all the exposed end grain first, then apply a thin, even layer of oil to all the worktop surfaces, and let this soak in for 30 minutes.
(Do not allow the top to ′swim′ in the oil). Apply a second layer to the worktop after 30 minutes - without wiping away any excess oil - and allow this soak in for another 30 minutes. Finally, with a dry clean cloth, wipe away any excess oil to avoid blotches, ensuring a uniform spread of oil.

Finishing:
12 hours after the last oiling sand the worktop lengthways (in the direction of the staves) with a fine but non-abrasive sponge (grit 180-220) and remove the dust. Afterwards, oil the worktop again. Let this soak in for 30 minutes and again, with a dry clean cloth, wipe away any excess oil to avoid blotches. The treatment should be repeated within the next 6 - 8 hours. 24 hours after last treatment. For the best results, and to increase the top′s resistance to water penetration, treat the work top every other day for the first six days, and then every third day until the worktop is saturated (approximately eight weeks). The worktop needs then only to be treated as required.

If using Hardwax-Oil (high solid) a slightly different finishing method should be used. To apply, use either a rag or a brush. Hardwax-Oil is ready to use. Apply the 1st coat thinly to both faces and all edges (including sink/hob cut outs) and leave to dry overnight (at least 8 - 10 hours) allowing good ventilation. Apply 2nd coat thinly as above. Remove eventual surplus immediately. Leave to dry at least 8 - 10 hours. Apply one final coat of Hardwax-Oil to the face only. The surface will harden within 2 - 3 weeks.

As a natural product, splits and shakes can occur in all species of timber. These can be exaggerated or caused when a worktop has been exposed to excessive moisture from sinks, over-filled kettles, spillages not wiped up promptly or through improper maintenance. Excessive heat will also cause splits or shakes to appear.

If you accidently drop a heavy item and dent the worktop, it can be removed by wetting a clean cloth and carefully iron (using the small tip)
on a hot setting over the dented area. For deep dents try several times and eventually the bruised area will lift back up to the original level.

For maintenance of tops finished with Hardwax-Oil; for daily cleaning, use a damp cloth with diluted washing up liquid and wipe dry as usual. For heavier stains and regular maintenance, Liquid Wax Cleaner is recommended.

 Cleaning Glass (Including glass worktops):

The easiest of all - use glass cleaner such as Windowlean.
Use a dry cotton towel instead of paper towels or newspaper. Many smudges can simply be wiped off with a clean, dry towel, but if the smudge is greasy, spray it with window cleaner, then wipe off with a dry towel. There′s no need to clean an entire surface just to remove a smudge or two.

Use a razor-blade scraper to remove paint, glue or adhesive from glass. Wet the surface first, then scrape in one direction to avoid scratches.

 Cleaning Stainless Steel:

Water-borne deposits clinging to the steel surface cause discolouration and cause most marks on stainless steel. Such stains known as the “rainbow effect” can be avoided by removing wet cloths, containers etc.
Cleaning stainless steel is simple; just wipe with undiluted vinegar on a dampened cloth!
You should find that any little stains on the stainless steel will be dissolved by the vinegar.
Also use vinegar to lift limescale from waste outlets and overflows, leave it to act before rubbing.

After rubbing and washing with warm soapy water, you will finish with shiny stainless steel.
To remove grease marks and clean brushed stainless steel, wipe with baby oil on a paper towel, this makes it look just like new.

Stainless steel will always scratch, and because of the directional polishing marks on many sinks, scratching may show up quite dramatically initially. However, with regular use and perodic cleaning (such as using "Shiny Sinks" cleaner) the stainless steel will build up a patina over the years and the scratch marks will become progressively less visable.

One of the best products on sale for cleaning stainless steel is “Bar Keepers Friend” or “Shiny Sinks” which is available from most supermarkets, "Bar Keepers Friend" should be sprinkled onto the sink and worked into a paste with a stiff nylon brush - not a cloth or washing up brush - before the sink is thoroughly rinsed and dried, finish by applying “Shiny Sinks”.

All our sinks are made from premium quality 304 austenitic 18/10 chrome/nickel steel, which is metallurgically incapable of rusting or corroding under normal household conditions.

Please Note: stainless steel can sometimes harbour ferrous (iron based) particles from the water supply, especially
during or immediately after new installations, where pipework (particularly old iron pipes) have been disturbed.
Filings are deposited on the stainless steel sink surface, where they will cling, and then rust, unless removed.

Return to the top of the page


 Cleaning Chrome Taps:

Clean with a neutral detergent, rinse well and then buff with a soft lint-free cloth until dry.
If the chrome has a build up of Limescale, pour some white vinegar over the area to be cleaned, or wrap vinegar soaked kitchen tissue around, or cover with a vinegar filled plastic bag to allow the vinegar to work. Leave for a couple of hours then rinse thoroughly and your taps will look as good as new.
For more stuborn stains use two tablespoons of vinegar with one teaspoon of salt.

 Cleaning the Refrigerator:

To keep the fridge clean wash out with detergent, rinse well and deodorise using bicarbonate of soda in the final rinsing water. Pay particular attention to the rubber seals on the doors, cleaning in the folded edges.
After cleaning out the inside, if it is a free-standing ′fridge don′t forget to pull the appliance out and clean underneath, also cleaning the external casings of the fridge. Not just the inside.

Keep stored food in containers, and keep these containers clean - inside and out. Do not store cooked food in contact with raw food. This is where most cross-contamination occurs. Always keep the fridge at the manufacturers recommended storage temperature.

To keep smells out of fridge use bicarbonate of soda. Fill a small jar with perforated lid with the soda and cover with some cotton material or gauze. Another easy way to rid your refrigerator of unpleasant smells is to place a few USED tea bags at the bottom of the fridge. Leave overnight, and the next day the smell will have gone, simple but effective!

 Cleaning the Oven:

To cheaply remove really tough stains in the oven, consider a mix of baking soda and water, left on the stain for a few minutes before rubbing away.

 Cleaning the Microwave:

Clean the microwave interior using a clean cloth and a very small amount of washing up detergent if there are stuborn stains. Rinse the cloth and remove all traces of detergent. Dry with a clean lint free cloth. To eliminate cooking smells lingering in your microwave, put half a lemon in a bowl of water and heat for a few minutes on low power.

 Cleaning Aluminium:

Aluminium is a soft metal, but it cleans easily, you can use scouring pads on it providing they are fairly fine.

Soak or wipe aluminium in a detergent solution, rinse well and dry quickly. Aluminium which is left to dry tends to leave water marks.
Always take care to read the manufactuerers instructions supplied for the particular appliance - before attempting to clean.

What you cannot use on aluminium is a caustic detergent of any kind, it reacts with it
and you will find that your nice aluminium turns black and pitted and is ruined beyond repair.

 Cleaning the Sink Drains:

It is always best NOT to pour fat down a drain as it can solidify and block pipes, this can prove to be very costly to remove when the plumber is called out. Try mixing the fat with cheap porridge oatmeal, you can always mix a few nuts and dried fruit, let it set hard and put out for the birds. If you have managed to block the drain, firstly remove as much water as possible, try mixing a large amount of Bicarbonate of soda with some boiling water and slowly pouring down the drain. Always wear safety goggles before attempting these tips.

Return to the top of the page

Please contact us to discuss your requirements.


<<<<<< PAGE 43   ..................PAGE-44.................   PAGE 45 >>>>>>